 Save It
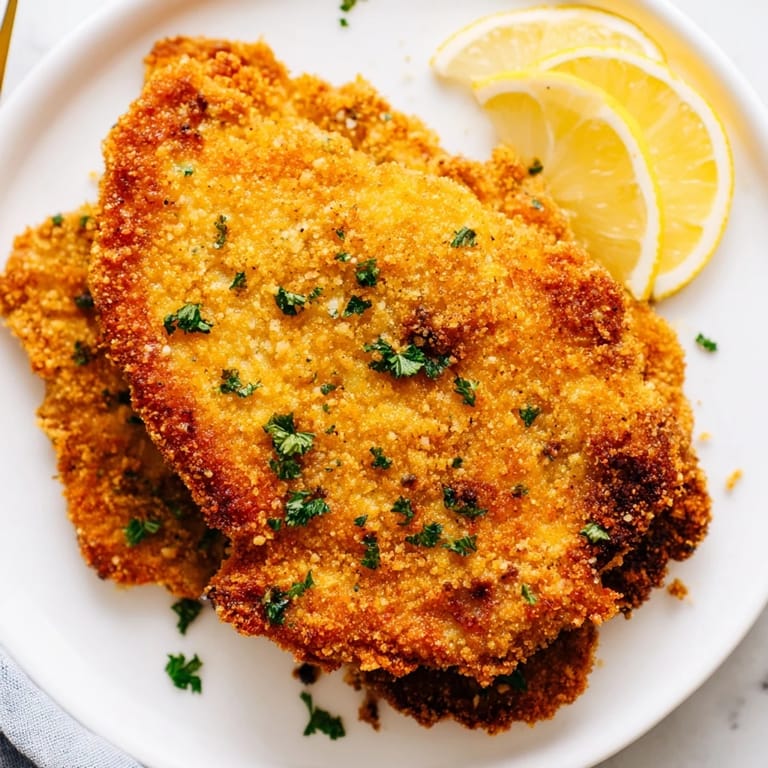
 The first time I got a German schnitzel right, I wasn't even trying to. I'd invited my neighbor over for dinner and had exactly thirty minutes before she arrived, so I grabbed the thinnest chicken breasts I could find and started whacking them with a rolling pin like I was taking out the day's frustrations. That metallic pounding sound, the meat spreading thinner and thinner under each hit—something about it felt right, almost meditative. When that golden, crackling cutlet hit the plate twenty minutes later, with the breadcrumb crust still singing from the hot oil, I realized I'd stumbled onto something beautifully simple. It's the kind of dish that looks fancy but actually welcomes mistakes, as long as you don't overthink it.
I made this for my sister's surprise dinner when she came home from a long work trip, and I'll never forget how her eyes lit up the moment that first bite's crust crackled between her teeth. She'd been eating airport food and hotel meals for weeks, and something about this humble, unpretentious schnitzel seemed to unlock a conversation we hadn't had in months. We sat there, lemon juice still on our fingers, talking until the breadcrumbs went cold on the plate.
Ingredients
- Boneless pork chops or chicken breasts (4, about 150 g each): Thin cuts work best for even cooking, and pounding them yourself gives you control over thickness—I learned the hard way that uneven meat cooks unevenly.
- All-purpose flour (100 g): The flour layer acts as glue for the breadcrumbs, so don't skip or skimp on this step.
- Eggs (2 large) and milk (2 tbsp): The egg wash is your insurance policy—it helps the breadcrumbs stick through the entire frying process and creates that seal that keeps the meat tender.
- Fine dry breadcrumbs (150 g): Japanese panko works in a pinch, but true dry breadcrumbs give you a finer, more delicate crust that's harder to burn.
- Vegetable oil or clarified butter (120 ml): Clarified butter is the traditional choice and tastes noticeably better, though it costs more—use it when you want to feel a little fancy.
- Salt, pepper, and lemon wedges: The lemon isn't just garnish; it's part of the flavor story, cutting through the richness with brightness that makes you reach for another bite.
Tired of Takeout? 🥡
Get 10 meals you can make faster than delivery arrives. Seriously.
One email. No spam. Unsubscribe anytime.
Instructions
- Pound the meat to even thickness:
- Place each cutlet between two sheets of plastic wrap and pound steadily with the flat side of a meat mallet or a rolling pin until the meat is about 1/4 inch thick. You're aiming for even thinness so everything cooks at the same speed—thicker spots stay tough while thinner edges burn, so take your time here.
- Season generously:
- Sprinkle both sides with salt and pepper. Don't be shy; the breading will muffle some of the seasoning, so generous here means actually tasting it when you bite through.
- Set up your breading stations:
- Arrange three shallow plates or bowls in a line: flour in the first, beaten eggs mixed with milk in the second, and breadcrumbs in the third. This assembly-line approach keeps things moving and your hands only somewhat sticky.
- Bread each cutlet carefully:
- Dredge the meat in flour, shaking off any excess so the coating isn't thick and pasty. Dip into the egg mixture, letting excess drip off, then press gently into the breadcrumbs on both sides. The key word is gently—over-pressing squashes the breadcrumbs into the meat instead of letting them stay light and crispy.
- Heat your oil until it's ready:
- Pour oil or clarified butter into a large skillet and place over medium-high heat. You'll know it's ready when a tiny piece of breadcrumb dropped in sizzles immediately and floats to the surface. If it smokes heavily, the heat is too high and will burn your crust before the meat cooks through.
- Fry until golden and cooked through:
- Working in batches so you don't crowd the pan, place the breaded cutlets into the hot oil and fry for about 2 to 3 minutes per side until the crust is deep golden brown and the meat is cooked through. You'll hear a gentle sizzle the whole time—that sound is your cue that everything's happening right.
- Drain on paper towels:
- Transfer each schnitzel to a paper towel-lined plate right after frying. This brief rest drains excess oil and keeps the crust from getting soggy on the bottom.
- Serve while still warm:
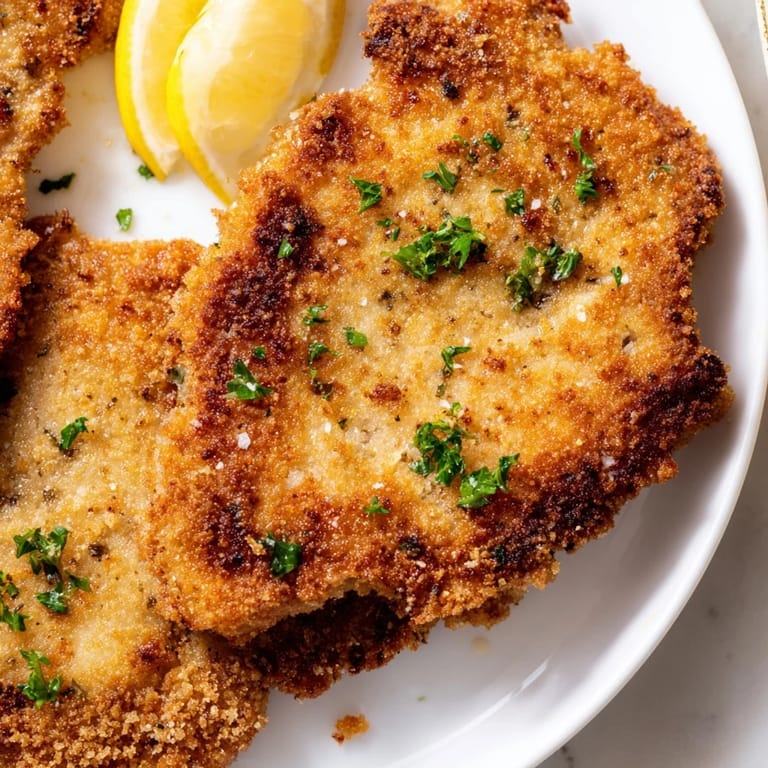
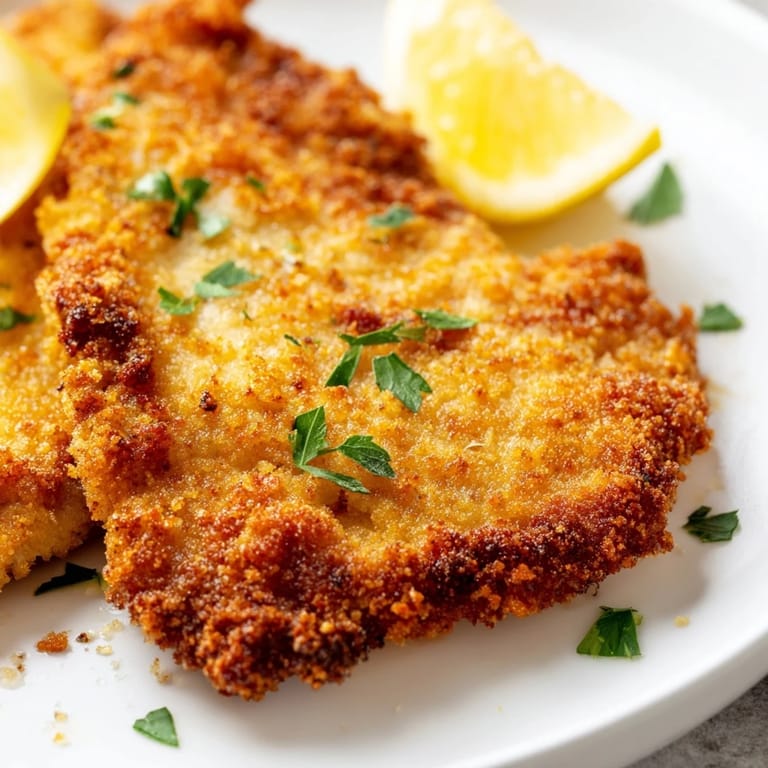
- Plate immediately with lemon wedges and a sprinkle of fresh parsley if you like. The magic of schnitzel is in that moment when the crust is still crackling, so don't let it sit.
 Save It
 There's a moment, right when the schnitzel comes out of the oil and the crust is still crackling and the meat is still steaming underneath, when food stops being about hunger and becomes about comfort. My dad used to say that this dish was proof that cooking didn't have to be complicated to be perfect, and every time I make it, I understand what he meant.
The Right Sides Matter
Schnitzel is traditional with potato salad or crispy fries, and there's a reason this pairing has survived generations. The cool, tangy potato salad provides balance to the richness of the fried crust, while fries let you chase every bite with something starchy and satisfying. I've also had it with a sharp vinegar-based cucumber salad that cuts through the oil in a way that feels cleansing and light. The best side is whatever makes you want to keep eating.
Why This Dish Feels Like Home
Schnitzel exists in that sweet spot between everyday comfort and something special enough to serve guests—it doesn't require obscure ingredients or techniques that make you doubt yourself halfway through. There's something honest about a thin piece of meat, breaded and fried until it's golden, that reminds you why people have been making this exact same thing for over a hundred years. It's the kind of recipe that gets passed down not because it's complicated, but because it's consistently, reliably delicious.
Making It Your Own
While the traditional German version calls for pork or chicken, you can absolutely use veal for an authentic Wiener Schnitzel if you want to splurge, and the technique stays exactly the same. I've experimented with herb-infused breadcrumbs (a little dried oregano mixed in) and it shifts the flavor just enough to feel new without losing that familiar comfort. The real lesson here is that once you understand the core method, you can play with it without fear.
- A squeeze of fresh lemon juice right before you eat is non-negotiable—it's the final note that ties everything together.
- If you're cooking for a crowd, you can bread the cutlets hours ahead and refrigerate them; the egg wash holds everything together even after sitting.
- Serve with a cold German Riesling or a crisp pilsner beer if you want to feel transported to a beer garden on a warm evening.
 Save It
 This is the kind of dish that proves you don't need hours or a long ingredient list to eat beautifully. Make it once and you'll understand why it's lasted this long.
Recipe FAQs
- → What type of meat is best for schnitzel?
Boneless pork chops or chicken breasts, pounded thin, work best to achieve a tender and even cook.
- → How do I ensure the breading stays crispy?
Coat the meat evenly without pressing breadcrumbs too firmly, and fry in hot oil or clarified butter until golden brown.
- → What sides complement this dish well?
Traditional sides include potato salad, cucumber salad, or crispy fries, enhancing the meal's balance.
- → Can I substitute veal instead of pork or chicken?
Yes, veal provides an authentic Wiener-style schnitzel with a delicate flavor and texture.
- → What oils are best suited for frying the cutlets?
Vegetable oil or clarified butter are ideal for achieving a crispy exterior without burning.
- → How should the meat be prepared before breading?
Place meat between plastic wrap and pound to about 1/4 inch thickness to ensure tenderness and even cooking.