 Save It
 The first time I attempted no-bake granola bars, I found myself dancing around the cluttered kitchen with bits of oats stuck to my fingers and a trail of honey across the counter. What struck me most was the scent—warm vanilla and toasted nuts mingling, even though no oven was humming. These bars quickly became my secret weapon for busy days, the kind of snack that feels like a tiny adventure with every bite. Sometimes, their cheerful crunch felt like a reward after a long phone call or a spontaneous walk. There’s something quietly satisfying about setting a tray in the fridge and waiting for the magic to happen.
I’ll never forget making a double batch for our neighborhood picnic, only to come back to find the kids trading them like playground currency. My friend tried to guess what made them so good, thinking it was some fancy ingredient, but it was mostly the right mix of crunchy and chewy bits. I loved how these little bars sparked so many grins around the picnic blanket, even as crumbs rolled into the grass. Watching someone take a bite and ask for the recipe felt like a quiet high-five. For a snack meant for on-the-go, they sure know how to steal the show.
Ingredients
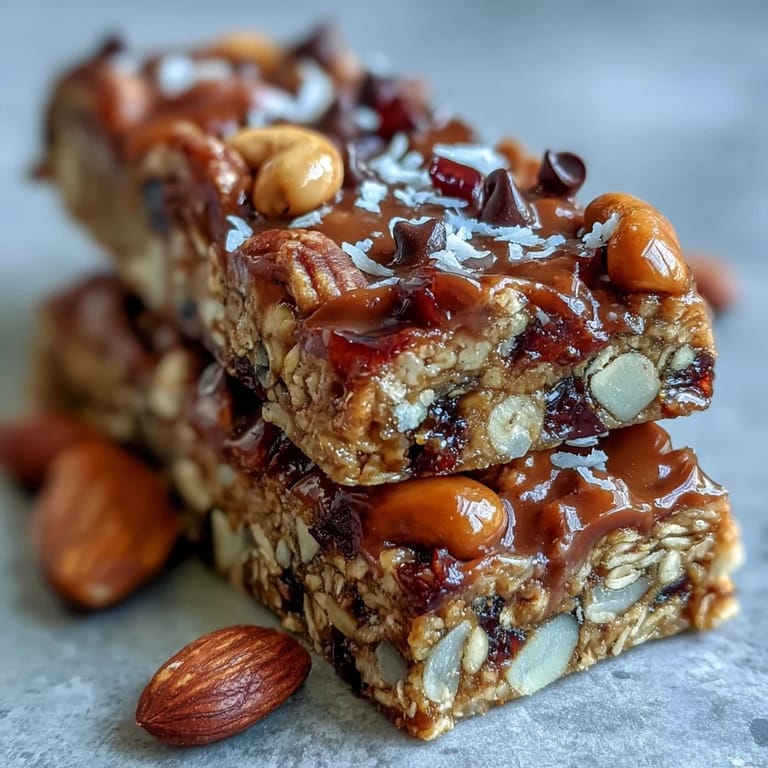
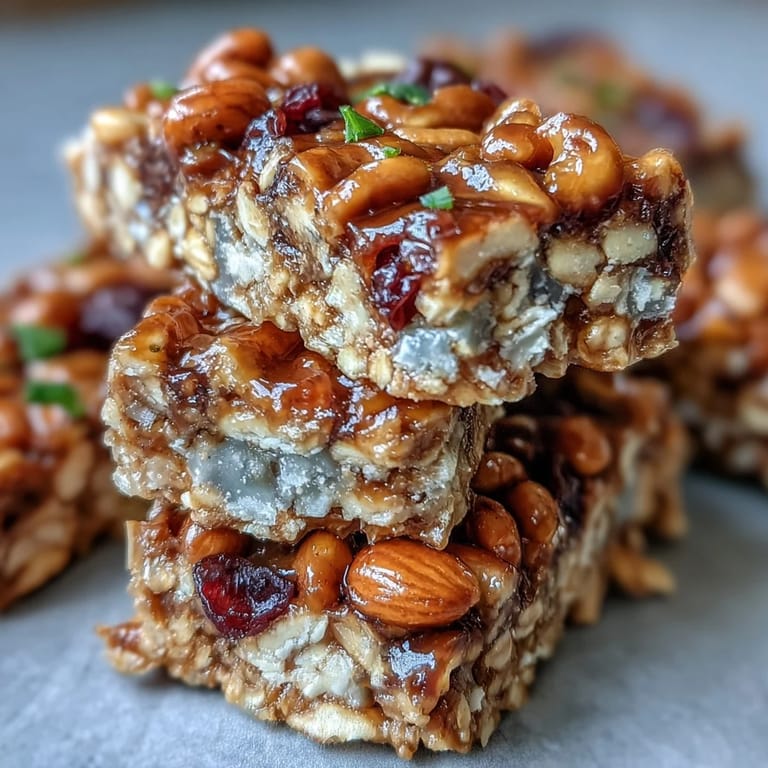
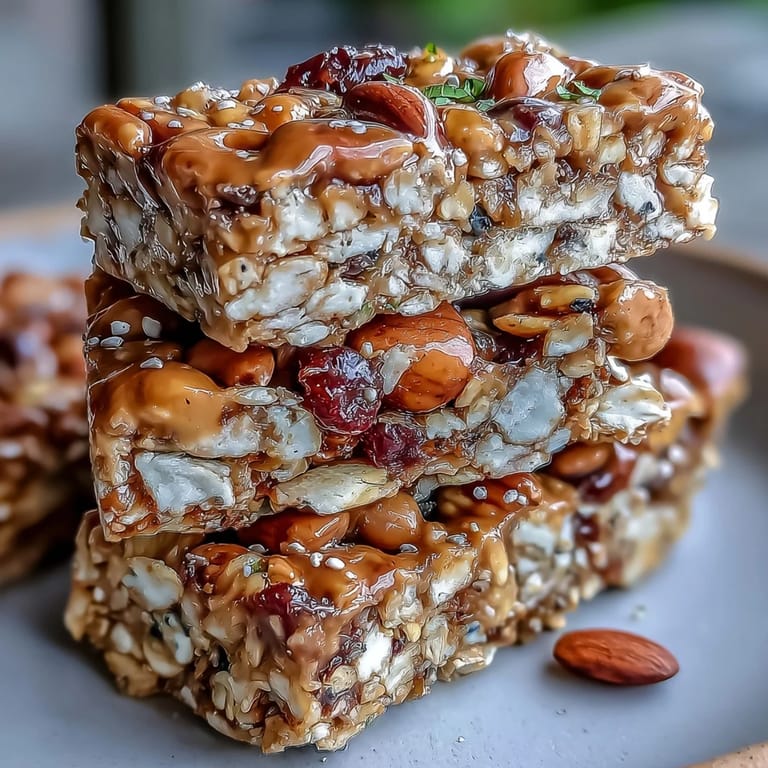
- Old-fashioned rolled oats: The base for that classic chewy bite—stick to rolled and avoid quick oats for the best texture.
- Crisp rice cereal: Adds a light, airy crunch; lightly crushing the cereal keeps every bar from crumbling apart.
- Chopped mixed nuts: Mix almonds, walnuts, or pecans for contrast; toast them briefly for extra flavor if you have time.
- Dried fruit: Cranberries, raisins, or apricots provide bursts of sweetness—chop any large pieces for even distribution.
- Unsweetened shredded coconut (optional): Gives a tropical hint, but skip if coconut isn’t your thing—no harm done.
- Salt: A pinch is all it takes to balance the richness and make other flavors pop.
- Honey or maple syrup: Both hold everything together; I sometimes swirl both for a deeper sweetness and aroma.
- Creamy peanut butter or almond butter: Nut or seed butter brings that signature chew; be sure it’s smooth for easy mixing.
- Vanilla extract: Just a teaspoon makes the whole kitchen smell better and rounds out any edges.
- Mini chocolate chips (optional): They melt slightly if stirred in too soon, so patience saves the day.
- Chia seeds or flaxseed meal (optional): For a boost of nutrition and a faint, toasty flavor.
Tired of Takeout? 🥡
Get 10 meals you can make faster than delivery arrives. Seriously.
One email. No spam. Unsubscribe anytime.
Instructions
- Prep the pan:
- Line an 8-inch square pan with parchment, letting it overhang so you can lift the bars out later in one go.
- Combine the dry ingredients:
- Mix oats, rice cereal, nuts, dried fruit, coconut, and salt in a big bowl; it may look like a lot now, but it’ll come together.
- Make the binding mixture:
- Heat the honey or maple syrup with peanut butter in a small saucepan on low, stirring often until smooth, then take off the heat and stir in vanilla.
- Coat the dry mix:
- Pour the warm, glossy mixture over the dry mix and stir with a sturdy spatula or spoon until everything’s sticky and evenly coated.
- Add any extras:
- If using chocolate chips, let the mix cool for a few minutes before folding them in gently so they don’t disappear into a chocolate swirl.
- Press into the pan:
- Spoon everything into your lined pan and press down firmly with a spatula or the bottom of a measuring cup for even, packed bars.
- Finish and chill:
- Scatter more chocolate chips or nuts over top if you like, gently pressing them in, then refrigerate for at least an hour until set.
- Slice and store:
- Lift out with parchment, cut into tidy bars, and keep them covered in the fridge so they stay fresh and chewy all week.
 Save It
 The day these bars became my go-to treat was after a long bike ride last fall—pulling one out from my backpack, I realized this recipe wasn’t just convenient, it was a small act of self-care. Munching quietly in the golden afternoon light, I felt oddly accomplished for having made something so simple yet satisfying.
Get Creative With Your Add-Ins
One of the joys of making these bars is mixing up the flavors every time—sometimes I’ll toss in bits of dried mango, other weeks it’s a handful of pepitas or sunflower seeds. Even a dash of cinnamon or a sprinkle of flaky sea salt on top can bring a whole new character to the batch. There’s something playful about choosing your own adventure here, and every tweak starts to feel like a tiny experiment in happiness. Sharing bars with family, I love watching everyone try to guess the ‘secret’ addition.
Tips for Perfect Slicing
Patience pays off: after chilling, use the sharpest knife you have and wipe it between each cut for neat, bakery-worthy bars. Resist the urge to yank the bars out of the pan early; they need their time to firm up, especially if it’s extra humid in the kitchen. I’ve found that running the knife under hot water before slicing gives cleaner edges, and pressing down in one swift motion makes for less crumbling. These little tweaks make every bar look extra tempting when set out for a crowd.
Making Life Easier with Batch Prep
Whenever I want snacks sorted for the whole week, I double the recipe and stash bars in wax paper wraps—suddenly grabbing a snack feels like opening a tiny present. The beauty of this recipe is it scales up easily, saves money, and lets you skip those boxed bars at the store. On busy mornings, I’ve even crumbled a bar over yogurt or stirred bits into oatmeal for a change. Plus, knowing what’s inside always feels reassuring.
- Test a small piece first for your ideal chew.
- Store a few in the freezer for unexpected snack emergencies.
- Label the batch with the date so they don’t get forgotten in the fridge.
 Save It
 Homemade energy bars invite you to create exactly the flavors you crave, no matter the season. Here’s to easier snacks and satisfying bites—may your kitchen always smell a little like honey and vanilla.
Recipe FAQs
- → How can I make these bars nut-free?
Use sunflower seed butter and replace mixed nuts with additional seeds or coconut to keep them nut-free.
- → Can I use different dried fruits?
Yes, try raisins, chopped apricots, cranberries, or any favorite combination for variety and flavor.
- → How do I ensure the bars hold together?
Press the mixture firmly and chill thoroughly to help the bars set and stay together when sliced.
- → Are these bars vegan friendly?
Use maple syrup and dairy-free chocolate chips for a fully plant-based version.
- → What's the best way to store them?
Keep bars in an airtight container in the refrigerator for up to a week to maintain freshness and texture.