Save It
 Last summer, I was rummaging through my freezer at midnight looking for something sweet when I realized I had everything for these bites sitting in my pantry. The Greek yogurt was about to expire, the peanut butter had been lonely in the back, and honey was calling from the shelf. Twenty minutes later, I had these creamy frozen nuggets that tasted like a protein-packed dessert dream, and I haven't stopped making them since.
My sister came over during a heatwave, complaining that nothing in the house sounded good, and I wordlessly handed her one of these straight from the freezer. She ate three before asking what they were, and now she makes her own batch every week with crushed pistachios and dark chocolate drizzles. That moment taught me that sometimes the simplest solutions become someone's new favorite thing.
Ingredients
- Plain Greek yogurt: Full-fat keeps these bites creamier and more indulgent, but low-fat works if that's what you have—I've used both and honestly can't taste a huge difference once frozen.
- Creamy natural peanut butter: The kind with just peanuts and maybe salt, not the stuff with added oils and sugar, because those actually make the texture grainier when frozen.
- Honey: This is your sweetener and also what keeps these from being rock-hard straight from the freezer—maple syrup works just as well if you're going the vegan route.
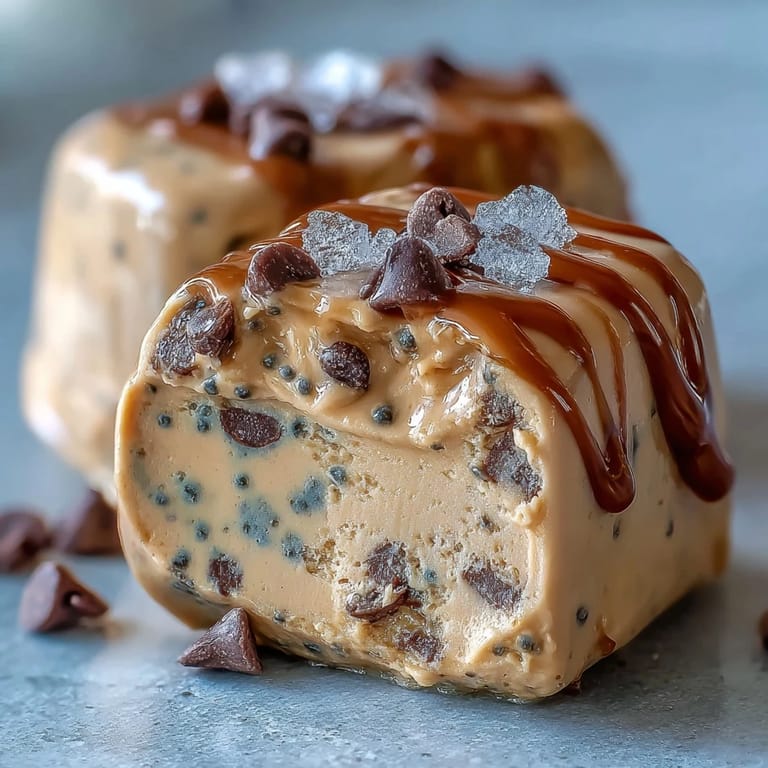
- Mini chocolate chips: These little additions give you bursts of richness without overwhelming the bite, but any toppings you love will work here.
- Optional flavor boosters: Vanilla extract brightens everything up, cinnamon adds warmth, and chia seeds sneak in extra nutrition if you care about that sort of thing.
Tired of Takeout? 🥡
Get 10 meals you can make faster than delivery arrives. Seriously.
One email. No spam. Unsubscribe anytime.
Instructions
- Mix your base:
- In a bowl, combine the Greek yogurt, peanut butter, and honey, whisking until everything disappears into a smooth, almost cloud-like mixture. If you're adding vanilla or cinnamon, this is when you stir them in so they're distributed evenly throughout.
- Prep your molds:
- Line a mini-muffin tin with paper liners or use silicone molds—the silicone ones are honestly easier because you can just squeeze the back and the bites pop right out. Either way, make sure they're clean and ready because you'll want to work quickly so the mixture doesn't get warm.
- Spoon thoughtfully:
- Divide the mixture among the cavities, using about a tablespoon per bite—don't overfill or they'll be messy to extract later. Leave just a tiny bit of room at the top if you're planning to add toppings.
- Top with abandon:
- This is where you get to have fun—sprinkle chocolate chips, chia seeds, crushed nuts, whatever calls to you. If you're doing a chocolate drizzle, melt a bit of dark chocolate and use a toothpick to swirl it across the top before it sets.
- Freeze until solid:
- Pop the tray in the freezer for at least two hours, but honestly overnight is better because then they're completely set and won't crumble when you take them out. You'll know they're done when they feel hard to the touch and don't jiggle at all.
- Release and store:
- Run warm water over the bottom of the tray for just a few seconds to loosen them, then gently press from below to pop them out. Transfer to a freezer-safe container where they'll keep for up to two weeks, though they never last that long in my house.
 Save It
 One morning before work, I grabbed a few of these from the freezer and threw them in my bag for a mid-afternoon snack. They had softened just enough by lunch to have this incredible creamy texture, and my coworker asked what I was eating because apparently my contentment was audible. That's when I realized these little bites had become my favorite kind of food—the kind that makes you genuinely happy without any drama.
Why These Bites Win Every Time
The magic here is that Greek yogurt and peanut butter are actually a perfect pair—the tanginess of the yogurt cuts through the richness of the peanut butter in a way that tastes sophisticated but requires zero skill. Honey adds sweetness that feels elegant instead of cloying, and when frozen, everything develops this almost mousse-like texture that's nothing like what you'd get if you just ate them cold from the fridge. The protein content means you're not just eating frozen sugar, which somehow makes them taste even better because there's zero guilt attached.
Customization Is Your Superpower
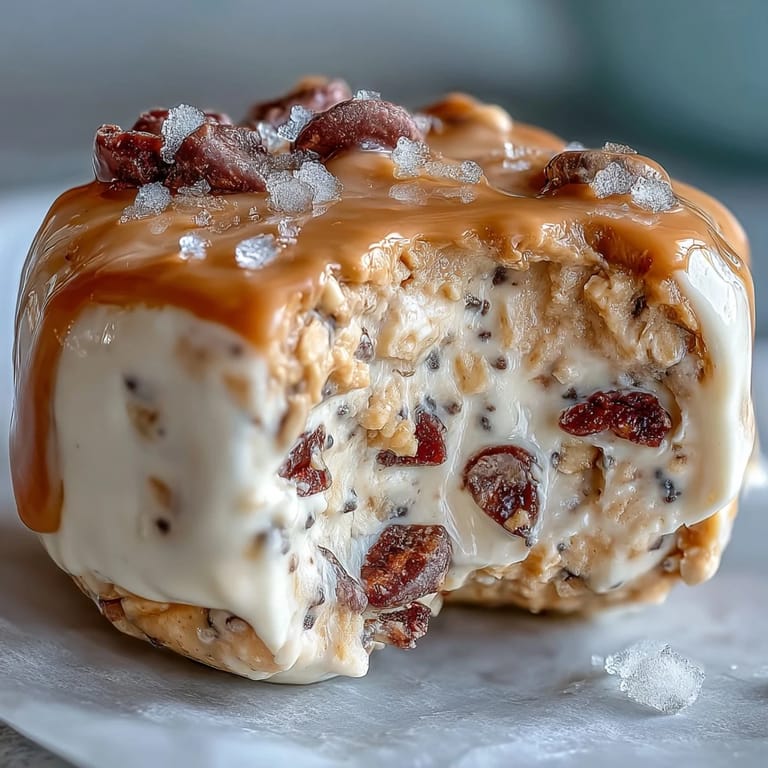
The base recipe is honestly just a canvas, and I've made versions with crushed granola for crunch, mashed berries for tartness, and even a salted chocolate swirl situation that made my kitchen smell like a fancy dessert shop. You can use almond or cashew butter instead of peanut butter, drizzle melted chocolate on top and freeze them again for double chocolate intensity, or keep them simple and pure if that's what your taste buds are asking for. The only rule is that you should make them the way that sounds most delicious to you right now, because that version will be the best one.
Serving and Storage Secrets
These are best eaten straight from the freezer with maybe a two-minute sit at room temperature if you want them slightly less frozen, but honestly they're perfect at any temperature depending on your mood. They pair beautifully with morning coffee, afternoon iced tea, or as a late-night freezer raid situation when you want something sweet without waking up your whole house. Storage is simple—just keep them in a freezer-safe container, and they'll stay good for up to two weeks, though I'd recommend eating them within the first week when the texture is at its peak.
- If they freeze a bit too hard, let them sit out for three to five minutes and they'll be at the perfect texture.
- Make them in batches and freeze extra so you always have a quick snack waiting for you.
- These make an excellent gift if you pack them nicely in a container with a little note about your favorite variation.
 Save It
 These frozen bites have become my answer to that late-afternoon slump when I want something satisfying that doesn't require turning on the oven. They're proof that the easiest recipes sometimes turn into your favorite ones.
Recipe FAQs
- → Can I use other nut butters instead of peanut butter?
Yes, almond or cashew butter can be used for a different flavor profile and similar creamy texture.
- → How long should I freeze the bites for best results?
Freeze the bites for at least 2 hours or until fully solid for optimal texture.
- → Are there options to add some crunch?
Crushed nuts or granola can be folded into the mix for added crunch and flavor variety.
- → Can I sweeten these bites differently?
Honey is recommended, but maple syrup works well as a vegan-friendly alternative.
- → What’s the best way to remove bites from the mold?
Run warm water over the bottom of the mold briefly before gently popping out the bites to avoid breakage.
- → Is it possible to add chocolate for extra indulgence?
Yes, drizzle melted dark chocolate over the bites before freezing or dip frozen bites in chocolate and refreeze.