 Save It
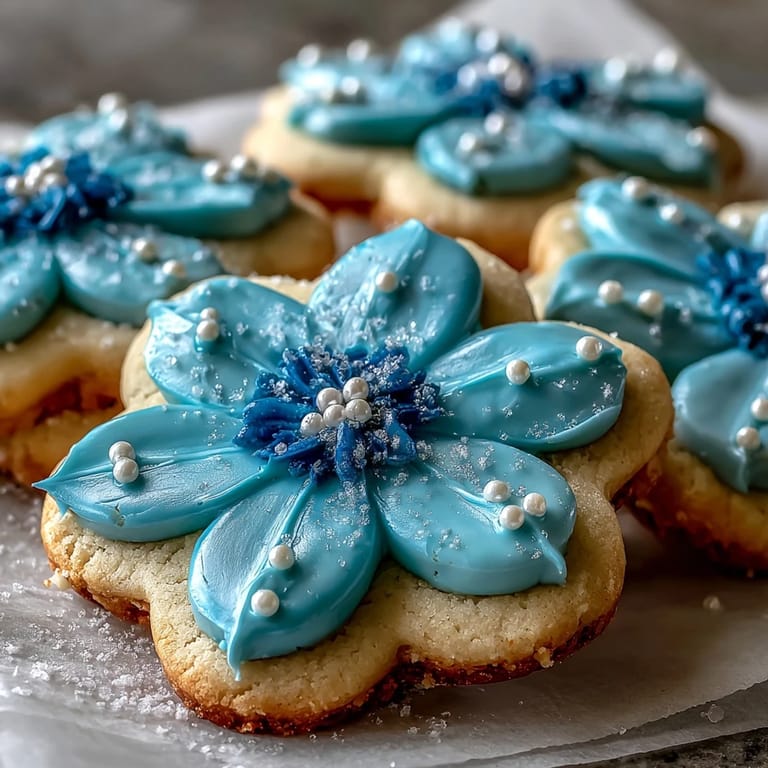
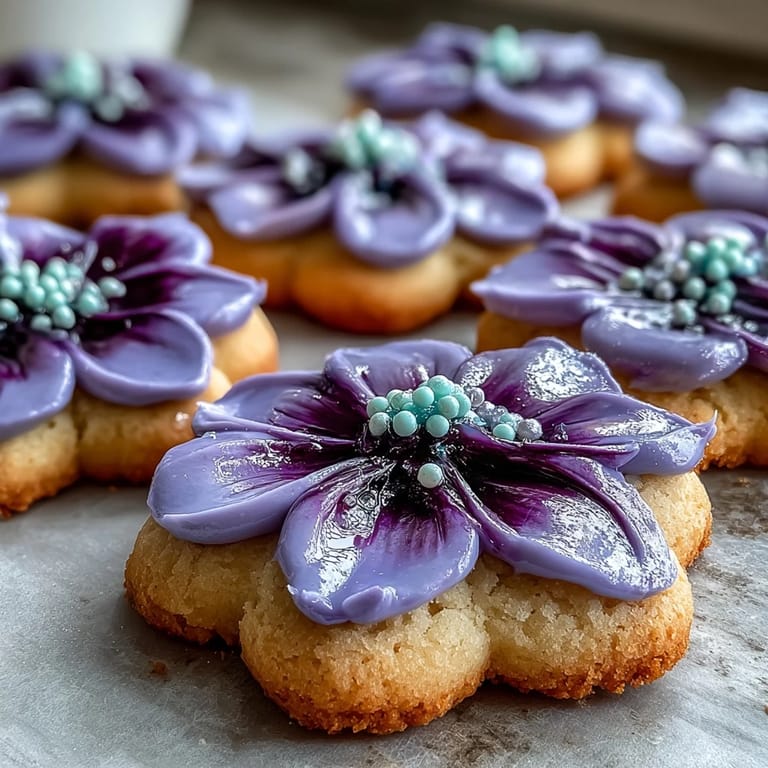
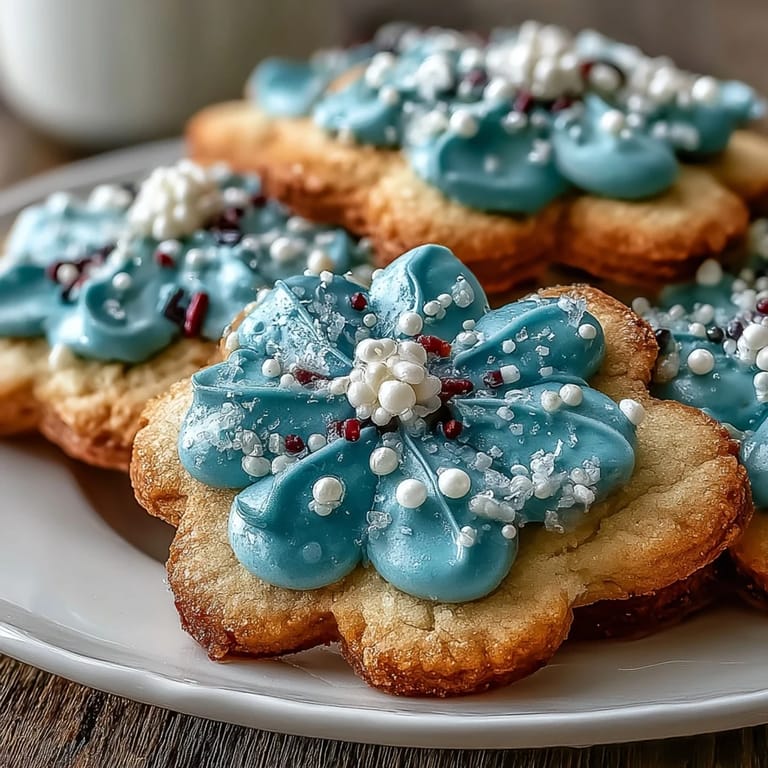
 The scent of buttery shortbread wafting up from the oven always transports me into the heart of spring—vivid colors and sunshine streaming through a kitchen window. One afternoon, the idea of making flower-shaped cookies struck while admiring blooms in my garden, and I found myself dusted in flour, humming along to the radio. There is a certain joy in pressing dough into shapes that feel cheerful and seasonal. The clatter of cookie cutters against my countertop still makes me smile. Trying out royal icing for the first time felt intimidating, but the process quickly turned playful as I mixed pastel colors and piped simple petals.
One chilly April evening, I baked these Spring Cookies for my neighbor's birthday, who has always admired anything floral. She peeked in midway, and together we mixed up bright icing, giggling as our first flowers looked more like abstract art. That sense of shared creativity made the cookies taste even better.
Ingredients
- Unsalted butter: Use it at room temperature so your dough stays smooth, and always opt for a good-quality brand for maximum flavor.
- Powdered sugar: Sift it to avoid lumps and achieve that perfect airy sweetness in both dough and icing.
- Pure vanilla extract: I learned that a splash more adds warmth and depth to the cookies without overpowering.
- All-purpose flour: Measuring carefully prevents tough cookies; a light hand is key for delicacy.
- Salt: Just a pinch balances the sweetness—you'll notice if you forget.
- Meringue powder: Essential for royal icing, and it keeps your decorations firm yet smooth.
- Water: Add spoonfuls gradually for icing, since too much leads to runny designs.
- Food coloring: Bright gels are best—they let spring hues shine without watering down the icing.
Tired of Takeout? 🥡
Get 10 meals you can make faster than delivery arrives. Seriously.
One email. No spam. Unsubscribe anytime.
Instructions
- Cream the butter and sugar:
- Beat the softened butter and powdered sugar together in a large bowl until pale and fluffy; the mixture should almost sigh when you stir it.
- Add vanilla:
- Pour in vanilla extract and mix until fully combined, inhaling that sweet aroma.
- Combine dry ingredients:
- Sift in flour and salt, folding gently with a spatula just until a tender dough forms; overworking can make cookies tough.
- Chill the dough:
- Divide the dough, shape it into two discs, wrap in plastic, and chill for 30 minutes to help keep those flower shapes crisp.
- Prep for baking:
- Preheat oven to 350°F (175°C) and line baking sheets with parchment—this prevents sticking and browning.
- Roll and cut:
- On a lightly floured surface, roll one disc of dough to 1/4 inch thickness, then cut flowers with your cookie cutter and place them 1 inch apart.
- Bake the cookies:
- Bake for 10-12 minutes, watching as the edges turn golden; a gentle push should leave a faint mark, signaling they're done.
- Cool and transfer:
- Let cookies cool on the sheets for 5 minutes, then move to a wire rack so they don't overcook underneath.
- Mix royal icing:
- Whisk powdered sugar and meringue powder, then add water gradually, mixing until you get a thick, smooth icing that holds its shape.
- Color and decorate:
- Divide icing into bowls, stir in food coloring, and pipe flower designs onto totally cooled cookies—enjoy the process, even if your first ones are wobbly.
- Let icing set:
- Allow cookies to sit until the icing is firm before serving or storing; this is when the magic happens!
 Save It
 One spring, these cookies became the star of a garden party, and I realized how a simple baked treat could spark laughter and celebration. The moment the platter emerged, the oohs and ahhs felt like applause for the effort poured into each petal and swirl.
Making Royal Icing Less Scary
Royal icing intimidated me at first, but taking it slow—and using a test cookie or two—made piping much more forgiving. Starting with thick icing prevents messy drips and lets you fix mistakes before decorating the final batch.
Choosing Cookie Shape and Size
Flower-shaped cutters add a springtime touch, but I've tried hearts or stars for other occasions. If you use smaller cutters, keep an eye on bake time—they brown more quickly and stay unusually tender.
Getting the Most from Decoration Time
Decorating is best with good company and a calm afternoon, so invite friends or kids to help. Set out all your colored icings and sprinkle jars in easy reach, and clean tips often for crisp lines.
- If you want glittery cookies, edible pearls or sparkles stick best right after icing.
- A tray or parchment will make post-decorating cleanup easy.
- Let cookies dry uncovered overnight for icing that truly sets.
 Save It
 Few things feel as festive, or as calming, as baking these cookies on a breezy spring weekend. Let your creativity bloom, and share each flower-shaped bite with those you love.
Recipe FAQs
- → How can I achieve even flower shapes?
Use a flower-shaped cookie cutter and roll dough to consistent thickness for uniform results.
- → Can royal icing be colored for more variety?
Yes, mix food coloring into royal icing to create assorted spring shades and decorative patterns.
- → How should I store the cookies?
Keep cookies in an airtight container at room temperature to maintain freshness for up to a week.
- → Is it possible to add extra flavors?
For a citrus twist, add lemon or orange zest to the dough before chilling and baking.
- → Can the dough be prepared ahead of time?
Yes, prepare dough in advance and chill overnight or freeze for later use if desired.
- → Are there nut-free alternatives for decoration?
Decorate with edible pearls or sprinkles instead of nuts to keep cookies allergen-friendly.