 Save It
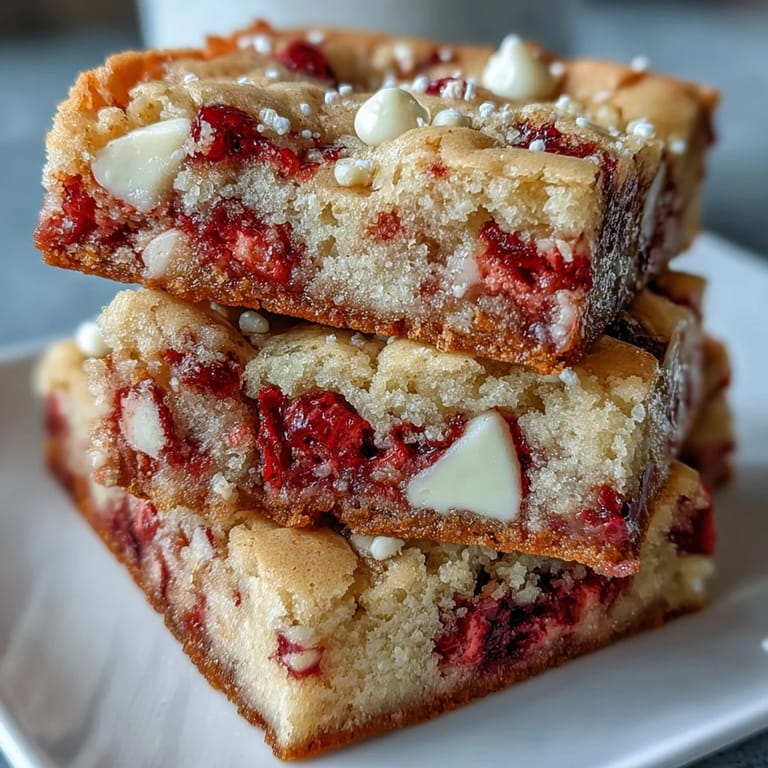
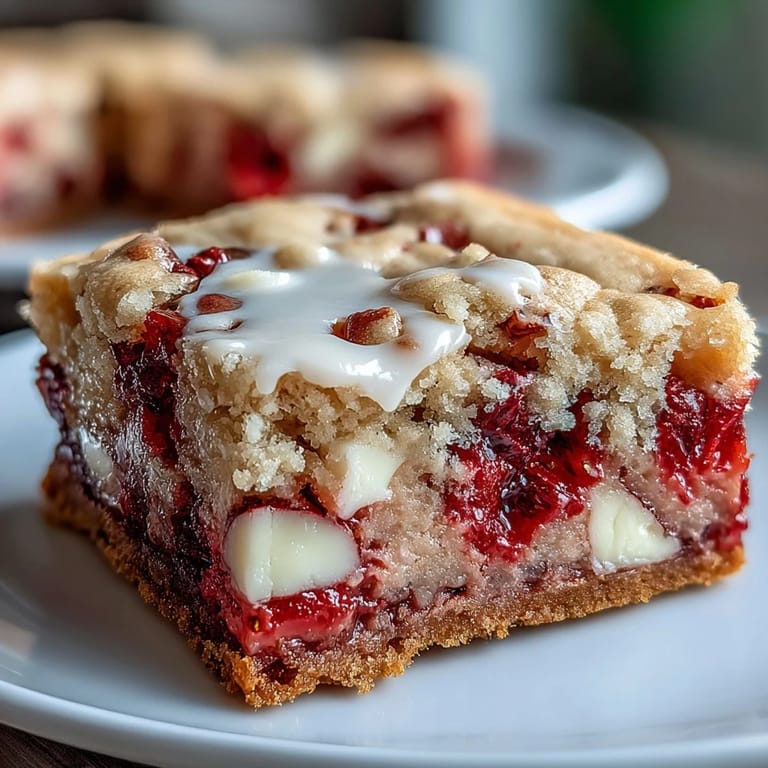
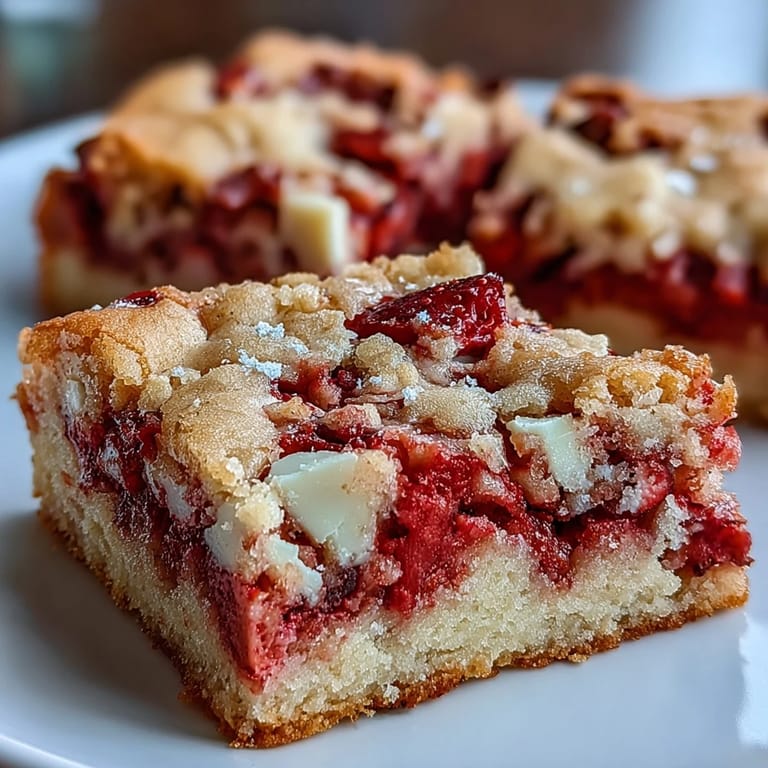
 My neighbor Sarah showed up at my door on a Tuesday afternoon with a container of these strawberry bars, and I immediately understood why she'd been raving about them at book club. The combination of buttery, tender cookie with bursts of fresh strawberry and creamy white chocolate felt like someone had figured out the perfect balance between indulgent and bright. I pestered her for the recipe, made them that weekend, and they've been rotating through my spring dessert lineup ever since—especially when I need something that feels special but doesn't require a full baking production.
I made these for my daughter's end-of-year classroom party, and watching the kids' faces light up when they bit into them reminded me why homemade still matters. One little girl asked if they had real strawberries in them, and when I nodded, she declared them her favorite thing she'd eaten all year—which absolutely made my day.
Ingredients
- All-purpose flour: Two cups gives you structure without making these dense or tough; measure by spooning and leveling, not scooping straight from the bag.
- Baking powder and baking soda: Together they lift the dough just enough so the bars stay tender; make sure both are fresh if you want them to work properly.
- Salt: A quarter teaspoon is small but crucial for balancing sweetness and bringing out the vanilla.
- Unsalted butter, softened: The softness matters because cold butter won't cream properly and you'll end up with dense bars instead of light ones.
- Granulated and light brown sugar: The mix of both creates a complex sweetness and helps keep the bars moist; brown sugar adds a hint of molasses that plays beautifully with strawberry.
- Egg: One large egg binds everything and contributes to that tender crumb structure.
- Vanilla extract: A teaspoon adds warmth and depth without making anything taste vanilla-forward.
- Fresh strawberries, diced: Use berries that smell sweet and feel firm; if yours are watery, pat them dry after cutting so excess moisture doesn't make the dough soggy.
- White chocolate chunks: Homemade chunks are larger and more satisfying than chips, but either works; some people swear by melting a few chunks on top during the last minute of baking for extra creamy pockets.
Tired of Takeout? 🥡
Get 10 meals you can make faster than delivery arrives. Seriously.
One email. No spam. Unsubscribe anytime.
Instructions
- Heat your oven and prep the pan:
- Set the oven to 350°F and line an 8x8-inch baking pan with parchment paper, letting a little overhang off two sides so you can lift the whole block out later like a dream. This step takes thirty seconds but saves you from scraping hardened crumbs off the pan for five minutes afterward.
- Combine your dry ingredients:
- Whisk flour, baking powder, baking soda, and salt in a medium bowl, then set aside. This mixing prevents little pockets of unmixed baking soda from creating weird soapy-tasting spots in your final bars.
- Cream the butter and sugars:
- Beat the softened butter with both sugars for two to three minutes until the mixture looks light, pale, and almost fluffy. You'll feel the difference when you're creaming it right—it goes from heavy and compact to something almost airy.
- Add the egg and vanilla:
- Mix in the egg and vanilla until everything is fully combined and smooth. Don't worry about slight overmixing here since you're working with wet ingredients.
- Bring the dry and wet together:
- Add the flour mixture gradually and stir just until combined, then stop. Overmixing at this stage activates gluten and toughens the bars, which is the opposite of what we want.
- Fold in the strawberries and white chocolate:
- Use a spatula to gently fold in the diced strawberries and white chocolate chunks, being careful not to crush the berries. This is where the mix starts looking like the finished product you're aiming for.
- Spread and bake:
- Pour the dough into your prepared pan and spread it as evenly as possible, then bake for 22-25 minutes until the top turns golden and a toothpick poked into the center comes out with just a few moist crumbs clinging to it. The pan will smell absolutely incredible at this point.
- Cool and cut:
- Let the bars cool completely in the pan on a wire rack, then lift them out using the parchment overhang and cut into sixteen squares. Cutting while completely cool prevents the bars from falling apart or crumbling.
 Save It
 My husband sneaked three of these bars from the container before I'd even finished cutting them all, and instead of being annoyed, I found myself laughing because they really are that good. That's when I knew this recipe had crossed from nice-to-have into the permanent rotation.
Fresh Strawberry Selection Matters
The difference between using strawberries at peak season versus sad January ones is genuinely noticeable, so pick berries that smell sweet and feel slightly soft when you squeeze them gently. I once made these with early-season strawberries that were pretty but flavorless, and the bars tasted fine but forgettable—nothing like the burst-with-juice version I'd made the week before. Spring and summer berries from the farmers market make a real difference in how alive these taste.
White Chocolate Variations Worth Exploring
The white chocolate pairs beautifully with strawberry, but I've played around with dark chocolate chunks when I want something less sweet, and milk chocolate when I'm feeding kids who find white chocolate too rich. Dark chocolate especially creates a grown-up version that's almost sophisticated; milk chocolate feels like comfort. None of these swaps changes the technique—just swap the amount of chocolate chunks one-to-one and you're done.
Storage and Make-Ahead Tips
These bars stay soft and delicious in an airtight container at room temperature for up to three days, though they rarely last that long in my house. You can also freeze the whole pan after it cools completely, wrapped tightly in plastic wrap, for up to two weeks—just thaw at room temperature for an hour before cutting and serving.
- Layer parchment paper between bars if stacking them to prevent sticking and keep them from absorbing flavors from the container.
- These are perfect for meal prep because you can grab one with your morning coffee or pack it in a lunchbox without any special handling.
- If your kitchen is warm, store bars in the fridge to prevent the white chocolate from softening too much.
 Save It
 These bars have become my go-to for moments when I want to show up with something homemade that feels thoughtful without being stressful. They're the kind of recipe that reminds you why baking from scratch matters.
Recipe FAQs
- → How should I prepare strawberries for the bars?
Use fresh, diced strawberries for the best texture and flavor. If frozen, thaw and pat dry to avoid excess moisture.
- → Can other chocolates replace white chocolate chunks?
Yes, milk or dark chocolate chunks can be used to change the flavor profile while keeping the creamy texture.
- → What is the ideal baking temperature and time?
Bake at 350°F (175°C) for 22-25 minutes until the top turns golden and a toothpick comes out with a few moist crumbs.
- → How do I ensure the bars have a soft texture?
Do not overmix the batter. Gently fold in strawberries and chocolate chunks before baking to maintain tenderness.
- → How should the bars be stored post-baking?
Store cooled bars in an airtight container at room temperature for up to three days to keep moisture and freshness.