 Save It
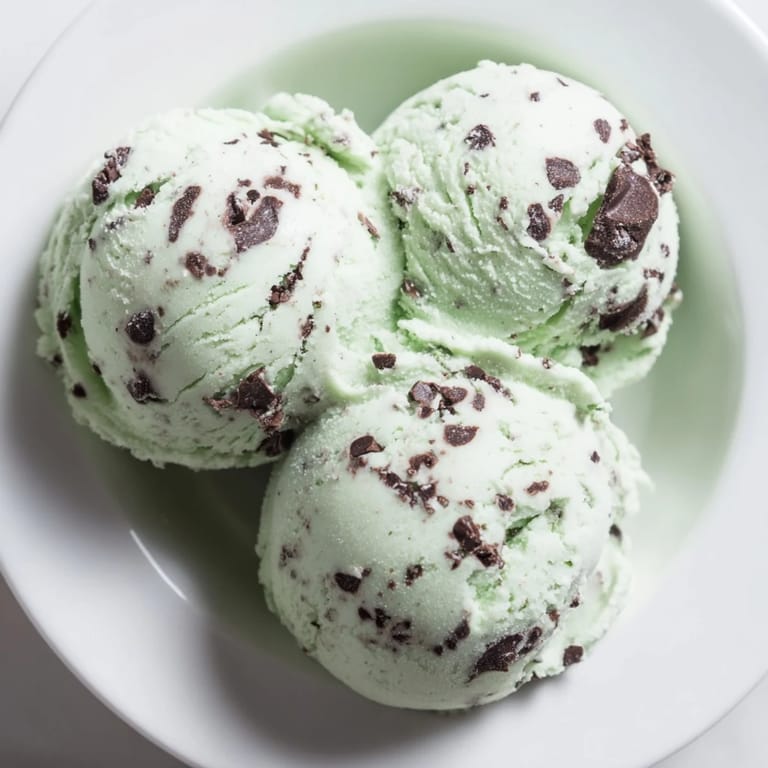
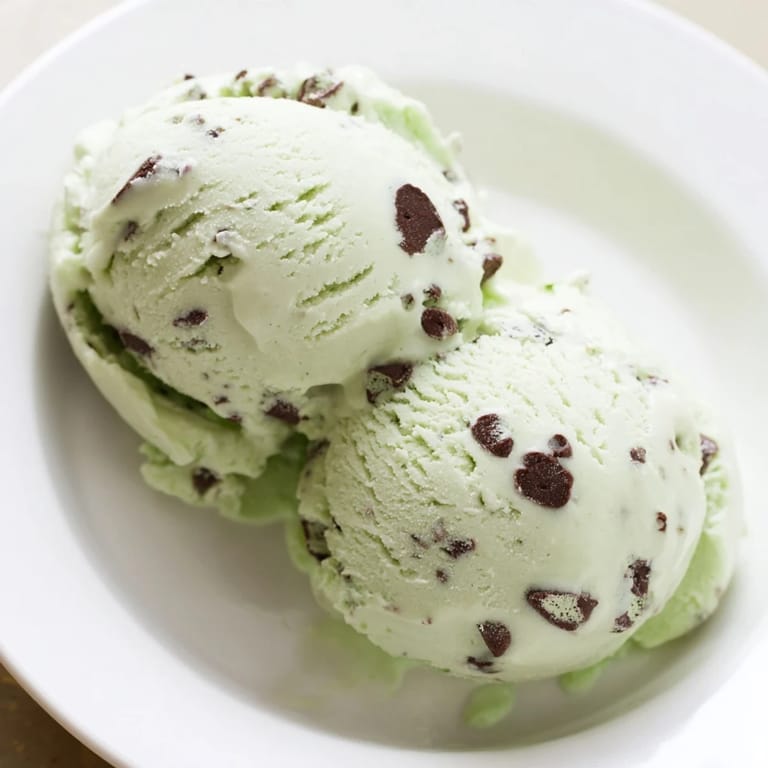
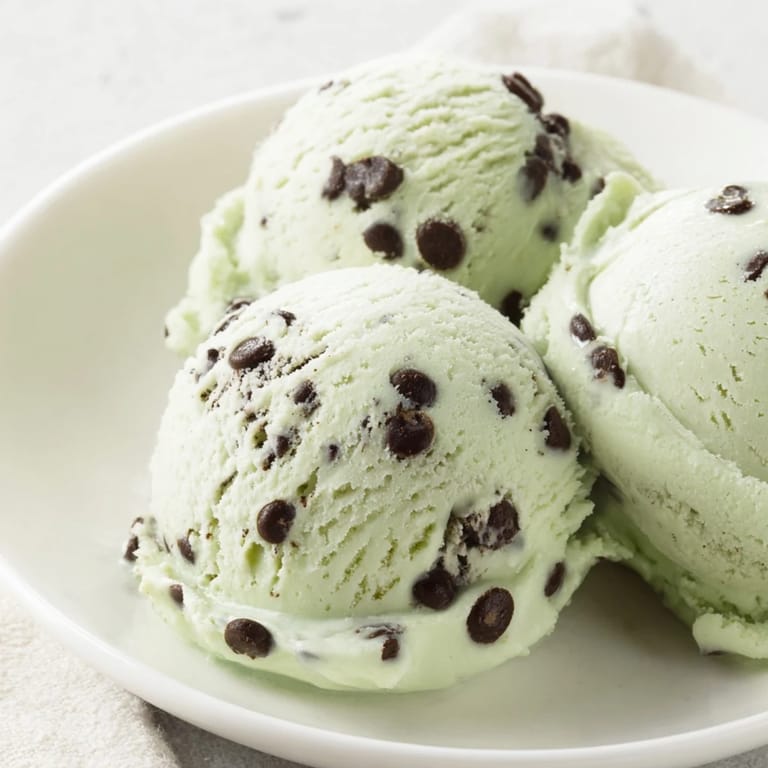
 I was rifling through my freezer one July afternoon, hunting for something cold, when I realized store-bought mint chip had lost its charm. The mint tasted artificial, the chocolate waxy. So I pulled out my ice cream maker, cracked open a carton of cream, and decided to make my own. The kitchen smelled like a peppermint dream within minutes, and I haven't looked back since.
The first time I served this to my neighbor's kids, they stood at my counter with green smudges on their chins, eyes wide, asking if I'd opened a secret ice cream shop. I hadn't. I'd just learned that tempering eggs and patience can turn a Tuesday into something memorable. Now it's my go-to whenever I want to impress without pretending I'm a pastry chef.
Ingredients
- Heavy cream and whole milk: The dream team for creamy, scoopable texture. Don't skimp on fat here or you'll end up with icy crystals.
- Granulated sugar: Sweetens and helps keep the ice cream soft enough to scoop straight from the freezer.
- Egg yolks: These create the custard base that makes homemade ice cream taste luxurious, not just frozen.
- Peppermint extract: A little goes a long way. Start with less if you're nervous, you can always add more.
- Vanilla extract: Rounds out the mint and keeps it from tasting one-note.
- Green food coloring: Totally optional, but it does make it look like the mint chip you remember from childhood.
- Semisweet chocolate chips: Mini chips distribute better, but chopped chocolate gives you those satisfying shards.
Tired of Takeout? 🥡
Get 10 meals you can make faster than delivery arrives. Seriously.
One email. No spam. Unsubscribe anytime.
Instructions
- Warm the Dairy:
- Combine the cream, milk, and half the sugar in a saucepan over medium heat. Stir occasionally until it's steaming and the sugar dissolves, but don't let it boil or you'll scorch the bottom.
- Whisk the Yolks:
- In a separate bowl, whisk the egg yolks with the remaining sugar until they turn pale yellow and slightly thick. This takes about a minute of good whisking.
- Temper the Eggs:
- Slowly drizzle about a cup of the hot cream into the yolks while whisking constantly. This warms them gently so they don't scramble when you add them back to the pot.
- Cook the Custard:
- Pour everything back into the saucepan and cook over low heat, stirring constantly with a wooden spoon. You'll know it's ready when it coats the back of the spoon and you can draw a line through it with your finger.
- Add the Flavor:
- Remove from heat and stir in the peppermint extract, vanilla, and a few drops of green coloring if you're using it. Taste it now, this is your chance to adjust the mint level.
- Chill Completely:
- Strain the custard through a fine-mesh sieve into a clean bowl to catch any stray bits. Let it cool, then cover and refrigerate for at least three hours or overnight.
- Churn and Add Chocolate:
- Pour the chilled custard into your ice cream maker and churn according to the machine's instructions. In the last few minutes, toss in the chocolate chips and let them swirl through.
- Freeze Until Firm:
- Transfer to a freezer-safe container and freeze for two to four hours until it's firm enough to scoop. The wait is the hardest part.
 Save It
 I once made this for a summer potluck and watched grown adults fight over the last scoop. Someone asked if I'd bought it from a fancy creamery. I just smiled and said I had a good recipe. That night, I realized homemade ice cream isn't just dessert, it's a quiet flex.
How to Get the Mint Flavor Just Right
If you want a deeper, more natural mint taste, steep a handful of fresh mint leaves in the milk and cream before you add it to the yolks. Let it sit off the heat for ten minutes, then strain the leaves out. I tried this once after growing mint in a pot on my windowsill and the difference was stunning. It tasted green and alive, not like extract from a bottle.
Choosing Your Chocolate
The chocolate you use matters more than you'd think. Cheap chips can taste waxy and dull once frozen. I started using chopped dark chocolate bars and the texture improved immediately. You get crisp, snappy shards instead of soft little pebbles. If you love sweet chocolate, go for semisweet or milk chocolate, just make sure it's something you'd eat on its own.
Storage and Serving Tips
Homemade ice cream hardens more than store-bought because it has no stabilizers. If it's too firm to scoop, let it sit on the counter for five to ten minutes before serving. I also press a piece of parchment paper directly onto the surface before freezing to prevent ice crystals from forming on top.
- Store in an airtight container to keep it fresh and prevent freezer burn.
- This ice cream is best enjoyed within two weeks, though it rarely lasts that long.
- Serve it in chilled bowls for an extra touch that keeps it from melting too fast.
 Save It
 There's something magic about pulling a container of homemade mint chip from your freezer and knowing you made it with your own hands. It tastes like summer, smells like comfort, and reminds you that the best things are worth the wait.
Recipe FAQs
- → How do I achieve a strong mint flavor?
Steep fresh mint leaves in the cream and milk mixture before cooking, then strain them out to intensify the mint essence.
- → Can I use different chocolate types?
Yes, using high-quality semisweet or bittersweet chocolate chips can enhance the flavor, and you can chop them to your preferred size.
- → What is the purpose of tempering the egg yolks?
Tempering prevents eggs from scrambling by slowly raising their temperature, ensuring a smooth custard base.
- → Is food coloring necessary?
No, it is optional and mainly used for a traditional green hue but does not affect the flavor.
- → How long should the mixture be chilled before churning?
It should be refrigerated at least 3 hours or overnight to ensure proper thickening and a creamy texture during churning.