 Save It
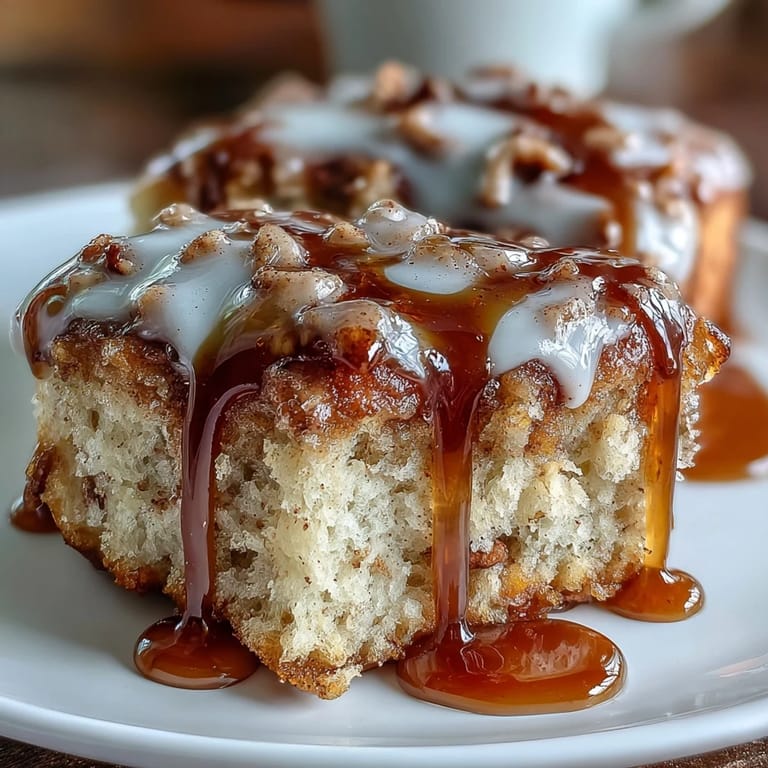
 My neighbor knocked on my door on a Saturday morning with maple syrup dripping down her chin, raving about these donut bars she'd just pulled from the oven. I watched her describe them with such genuine excitement that I had to try making them myself that very afternoon. What started as a casual weekend baking session turned into something I now make whenever I need to feel like I've got my life together in the kitchen.
I brought these to a book club meeting last month, and they disappeared before we even finished discussing the first chapter. One friend actually asked for the recipe mid-sentence, which felt like the highest compliment a baker could receive. That moment reminded me why I love baking—it's the quickest way to make people smile without saying a word.
Ingredients
- All-purpose flour: Use a light hand when measuring—scoop and level rather than packing it down, or you'll end up with dense, heavy bars.
- Granulated sugar: This sweetens the base, but don't skip the maple syrup mixed into the wet ingredients because that's where the real maple flavor lives.
- Baking powder: Check that yours isn't stale by testing it in water first—if it doesn't fizz, grab a fresh container.
- Salt: A pinch of this balances everything and makes the maple taste even more pronounced.
- Cinnamon and nutmeg: These warm spices echo the comfort of actual donuts without needing any deep frying.
- Unsalted butter: Melted rather than softened means the batter comes together faster and stays wonderfully tender.
- Whole milk: Creates a tender crumb; don't use skim or you'll notice the difference in texture.
- Eggs: These bind everything together and give the bars that soft, cake-like structure.
- Vanilla extract: A full teaspoon adds vanilla notes that play beautifully with maple.
- Maple syrup: Use pure maple syrup, not the pancake syrup—it makes all the difference in flavor depth.
- Powdered sugar: For the glaze; whisk it well to break up any lumps before adding liquid.
- Milk for glaze: Add it slowly—you want the glaze thick enough to coat but thin enough to drizzle.
Tired of Takeout? 🥡
Get 10 meals you can make faster than delivery arrives. Seriously.
One email. No spam. Unsubscribe anytime.
Instructions
- Set Your Oven and Pan:
- Preheat to 350°F and grease a 9×13 inch pan well—I use parchment paper for easy cleanup and because it makes lifting the cooled bars out so much simpler. You want every corner of your pan ready before you mix anything.
- Combine the Dry Ingredients:
- Whisk together flour, sugar, baking powder, salt, cinnamon, and nutmeg in a large bowl, making sure the baking powder is evenly distributed so you get consistent rise. This step takes less than a minute but saves you from lumpy batter later.
- Mix the Wet Ingredients:
- In another bowl, whisk melted butter, milk, eggs, vanilla, and maple syrup until everything is smooth and combined. The mixture should look slightly glossy and uniform.
- Bring It Together Gently:
- Pour the wet mixture into the dry ingredients and fold with a spatula until just barely combined—you want a few dry streaks visible because overmixing toughens the crumb. This is the one moment where less is truly more.
- Spread and Bake:
- Pour the batter into your prepared pan and smooth the top evenly with a spatula, then bake for 25 to 30 minutes until a toothpick comes out clean. The edges should be set and lightly golden, and the center should spring back gently when touched.
- Cool with Patience:
- Let the bars rest in the pan for 10 minutes to set slightly, then transfer to a wire rack to cool completely before glazing—this prevents the glaze from melting off. I know waiting feels impossible, but it's worth it.
- Make Your Glaze:
- While the bars cool, whisk powdered sugar with 1 tablespoon of milk, then add more milk one teaspoon at a time until you reach a thick but pourable consistency. Stir in the maple syrup and taste it—maple flavor should be the star here.
- Glaze and Set:
- Drizzle the glaze evenly over the completely cooled bars, then let it set for 10 to 15 minutes so it firms up slightly. If you want extra indulgence, drizzle a little more pure maple syrup over top once the glaze has set.
 Save It
 There's something about a homemade maple bar that transforms an ordinary Tuesday morning into something worth celebrating. Even now, when I pull a fresh batch from the oven, I understand why my neighbor showed up at my door with that maple-syrup grin.
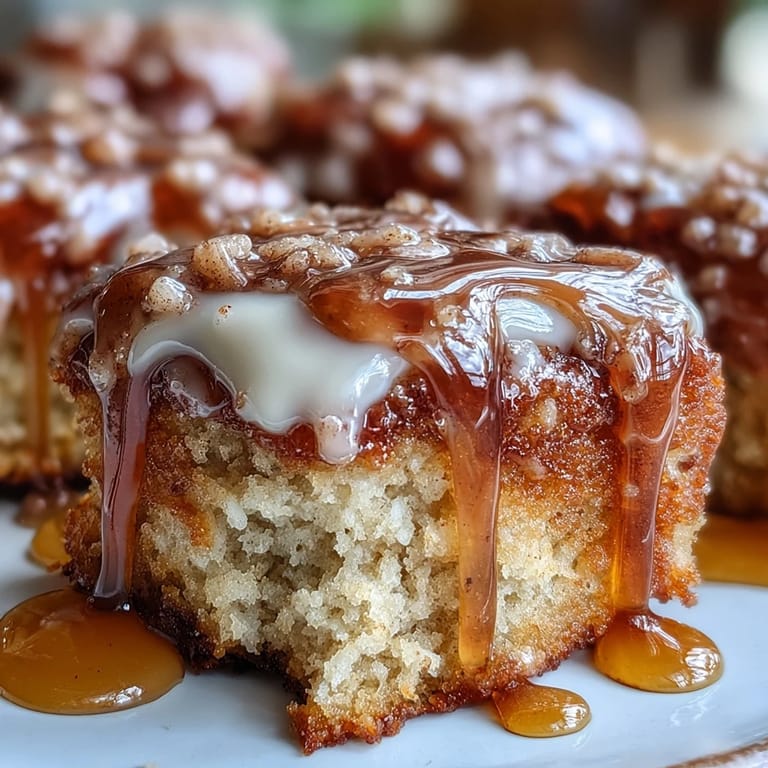
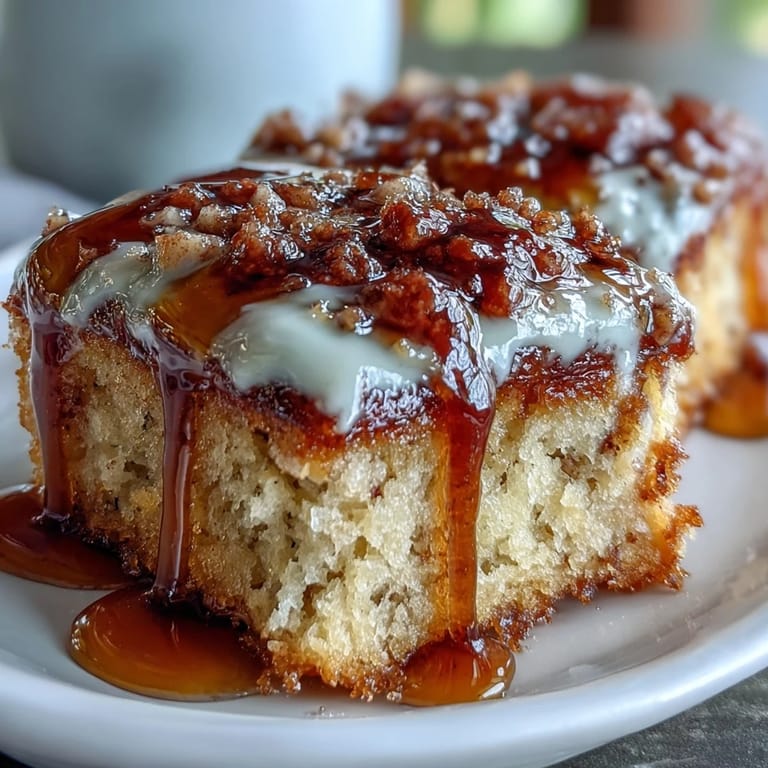
The Texture Sweet Spot
These bars exist in that perfect middle ground between cake and donut—soft enough to bite into easily, but structured enough to hold together. The secret is not overbaking and not overmixing, both of which can push them toward dense or tough territory. That 25 to 30 minute window is genuine; set a timer and trust it.
Serving and Storage Wisdom
Serve them at room temperature for the best flavor, though they're also lovely slightly warm with a scoop of vanilla ice cream melting into them. They keep beautifully in an airtight container for three days, which is helpful if you want to slice them in advance or need them ready for unexpected guests.
Elevating Your Bars
Once you've made these once, you'll start imagining variations and special touches to make them your own. A few drops of maple extract in the glaze deepens the maple flavor without making it taste artificial or overwhelming. The bars are excellent as they are, but they also welcome additions like a light dusting of cinnamon sugar right after glazing, a sprinkle of chopped pecans, or a dollop of whipped cream when serving.
- Try adding maple extract to the glaze for a more pronounced maple presence.
- Pecans or walnuts scattered on top before the glaze sets add welcome texture and nuttiness.
- Serve warm with whipped cream or vanilla ice cream for an indulgent twist that feels restaurant-quality.
 Save It
 These maple donut bars have quietly become the recipe I reach for when I want to impress people without stress. Every time someone asks for the recipe, I know I've created something worth sharing.
Recipe FAQs
- → Can I make these ahead of time?
Yes! Store cooled unglazed bars in an airtight container for up to 2 days. Add the glaze shortly before serving for the freshest taste and texture.
- → What's the best way to store leftover bars?
Keep glazed bars at room temperature in an airtight container for up to 3 days. Place parchment paper between layers to prevent sticking.
- → Can I freeze these maple bars?
Absolutely! Wrap unglazed bars individually in plastic wrap, then freeze in a freezer-safe bag for up to 3 months. Thaw overnight and glaze before serving.
- → How do I know when the bars are done baking?
Insert a toothpick into the center—if it comes out clean or with just a few moist crumbs, they're ready. The edges should be lightly golden brown.
- → Can I substitute the maple syrup?
For the batter, you can use honey or agave as alternatives. In the glaze, maple syrup provides distinct flavor—maple extract mixed with water works in a pinch.