 Save It
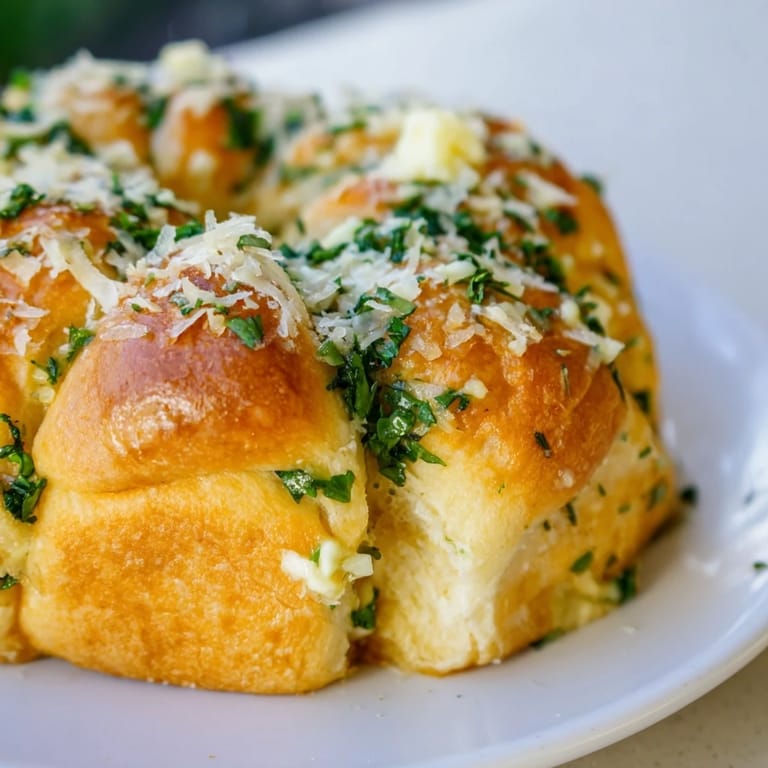
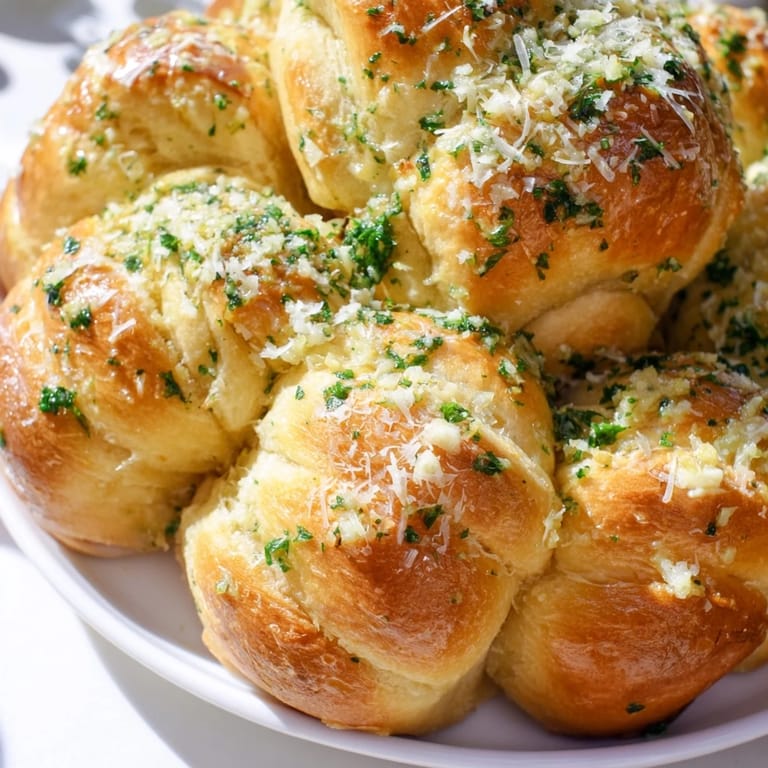
 There's something about tearing into warm bread at a dinner table that instantly brings people closer together. I discovered these garlic butter pull-aparts years ago when a friend brought them to a potluck, and I watched people abandon their forks to grab them with their hands, laughing and talking with their mouths full. The way the garlic butter pooled at the bottom of the pan and the golden edges came away so easily—I knew I had to learn how to make them. Now whenever I bake a batch, the aroma fills my kitchen with this irresistible invitation that seems to draw everyone in without me saying a word.
I made these for my sister's book club once, and they disappeared so fast I didn't even get to tell her I'd made them from scratch. She found me in the kitchen laughing, holding the empty pan, and her friends were already asking for the recipe before I'd even wiped my hands on a towel.
Ingredients
- All-purpose flour (3 cups): The foundation of tender rolls; measuring by weight if you have a scale prevents the dense mistakes I made early on.
- Instant yeast (2¼ tsp): Check your expiration date religiously—old yeast is the silent killer of bread dreams.
- Warm milk (1 cup): Not hot, not cool; around 110°F is the Goldilocks zone where yeast thrives without dying.
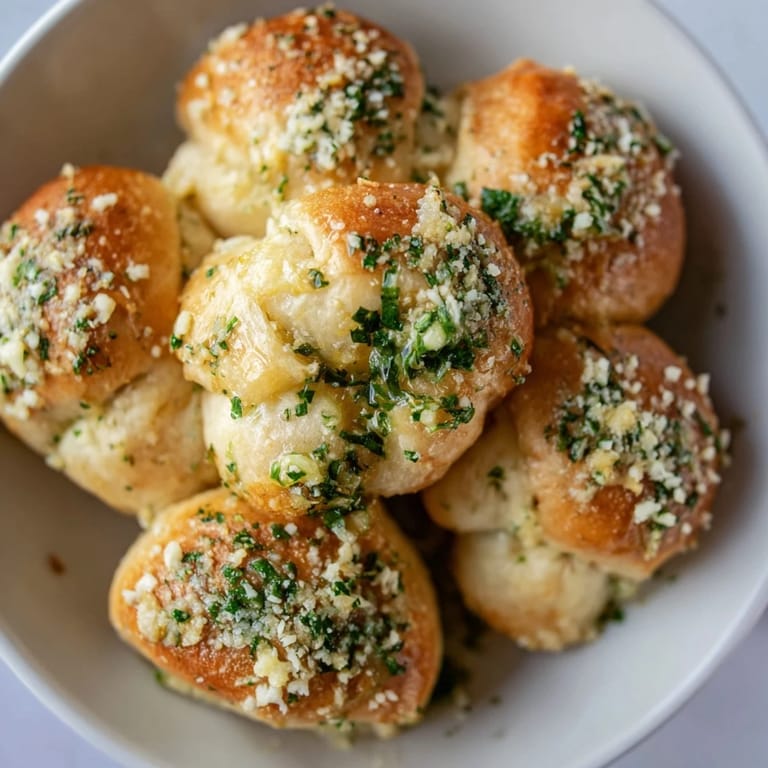
- Unsalted butter (2 tbsp in dough, 6 tbsp for garlic butter): The butter is what makes these rolls luxurious and golden, so don't skip it or substitute with oil.
- Fresh garlic (4 cloves, minced): Raw garlic transforms into something mellow and sweet during baking, so be generous with it.
- Fresh parsley (2 tbsp): It adds a brightness that prevents the rolls from feeling too heavy, and it looks beautiful flecked throughout.
- Parmesan cheese (2 tbsp, optional): A light sprinkle before baking adds a subtle nuttiness and golden crust appeal.
Tired of Takeout? 🥡
Get 10 meals you can make faster than delivery arrives. Seriously.
One email. No spam. Unsubscribe anytime.
Instructions
- Mix Your Base:
- Combine flour, yeast, sugar, and salt in a large bowl, then pour in the warm milk and melted butter. Stir until a shaggy dough comes together—it doesn't need to be perfect yet, just united.
- Knead Until Smooth:
- Work the dough on a lightly floured surface for 7–8 minutes (or 5 minutes in a stand mixer) until it becomes smooth, elastic, and springs back when you poke it. This is when you'll feel the transformation under your hands.
- First Rise:
- Place the dough in a greased bowl, cover it loosely, and let it rise in a warm corner of your kitchen for about an hour until it's doubled. You'll know it's ready when your finger leaves a dent that doesn't bounce back.
- Prepare the Garlic Butter:
- While the dough rises, mix melted butter with minced garlic, chopped parsley, salt, and pepper in a small bowl. The aroma alone is worth the step.
- Shape the Rolls:
- Punch down the risen dough, divide it into 12 equal pieces, and roll each one into a ball. They don't need to be perfect; rustic is more forgiving and looks better anyway.
- Coat and Arrange:
- Dip each dough ball into the garlic butter until coated, then nestle them together in a greased 9-inch round cake pan or oven-safe skillet. Drizzle any remaining butter over the top so nothing goes to waste.
- Second Rise:
- Cover loosely with plastic wrap and let them rest for 20–30 minutes until they're slightly puffy and touching each other. This is when they start looking like the magic pull-apart loaf they'll become.
- Bake to Golden:
- Heat your oven to 350°F, sprinkle with Parmesan if using, and bake for 22–25 minutes until the rolls are golden brown and the edges feel crispy. The kitchen will smell like a bakery at this point.
- Cool and Serve:
- Let them rest for 5 minutes so the insides set slightly, then serve warm and let people tear them apart with their hands.
 Save It
 There was this one Saturday when my neighbor smelled them baking and knocked on the door with her kids, asking if something was burning because the aroma was so intense. We ended up sharing them fresh from the oven with coffee, and it became our weekend ritual.
Flavor Variations to Explore
Once you master the basic version, these rolls become a canvas for creativity. I've made them with roasted garlic for a sweeter, deeper flavor, crispy sage and browned butter for fall gatherings, and even red pepper flakes mixed into the garlic butter when I'm feeling spicy. The beauty is that any addition to the butter layer transforms the entire dish without changing the technique, so you can keep making them without ever repeating yourself.
The Cheese Question
The Parmesan topping isn't mandatory, but I've learned it serves a practical purpose beyond flavor. That light sprinkle helps the top brown evenly and gives you a visual cue for when they're done—they go from pale golden to deep amber just right. Some versions call for tucking mozzarella cubes into the center of each ball before rolling, which creates little pockets of melted cheese; it's indulgent but takes the same amount of effort.
Serving and Pairing Ideas
These rolls deserve accompaniments that don't overshadow them. Tomato soup is the obvious choice and works brilliantly, but I've also served them alongside pasta, with a simple green salad, or honestly, just alone as the star of the meal. They're also surprisingly good the next day if you wrap them in foil and reheat them gently, though they never last that long in my house.
- Pair with a bright tomato soup or creamy mushroom bisque for a complete meal feeling.
- Serve them at room temperature the next day with a good olive oil for dipping if you manage to have leftovers.
- Add chili flakes to the garlic butter if your crowd likes heat, or keep them mild and let people adjust at the table.
 Save It
 There's something deeply satisfying about pulling apart a roll that's still steaming and watching the garlic butter drip from your fingers onto your plate. These rolls have a way of turning an ordinary dinner into something that feels intentional and warm, and that's really what good food is about.
Recipe FAQs
- → How do I make the bread rolls soft?
Using warm milk and kneading the dough until elastic helps develop gluten for softness. Letting the dough rise properly also ensures a tender texture.
- → Can the garlic butter be modified?
You can add chili flakes for heat or substitute parsley with other fresh herbs to customize the flavor.
- → What pan is best for baking the pull-apart bread?
A greased 9-inch round cake pan or oven-safe skillet works well to allow the rolls to bake close together for easy pulling apart.
- → Is Parmesan cheese necessary for this bread?
Parmesan is optional but adds a savory, slightly nutty topping that complements the garlic butter beautifully.
- → Can I prepare this bread ahead of time?
You can prepare the dough and the garlic butter in advance. Keep the dough refrigerated before the final rise, then bake fresh for best results.