 Save It
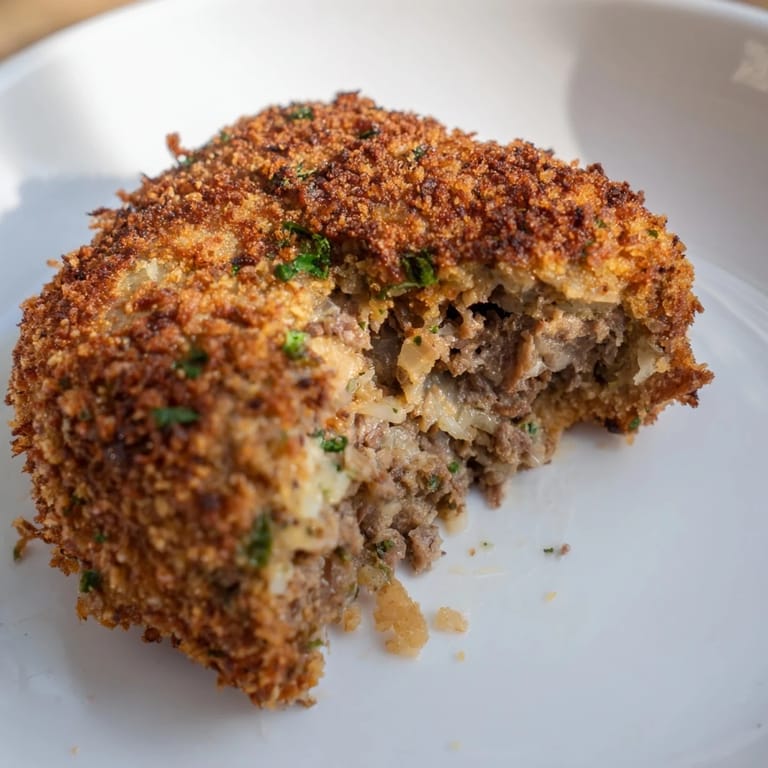
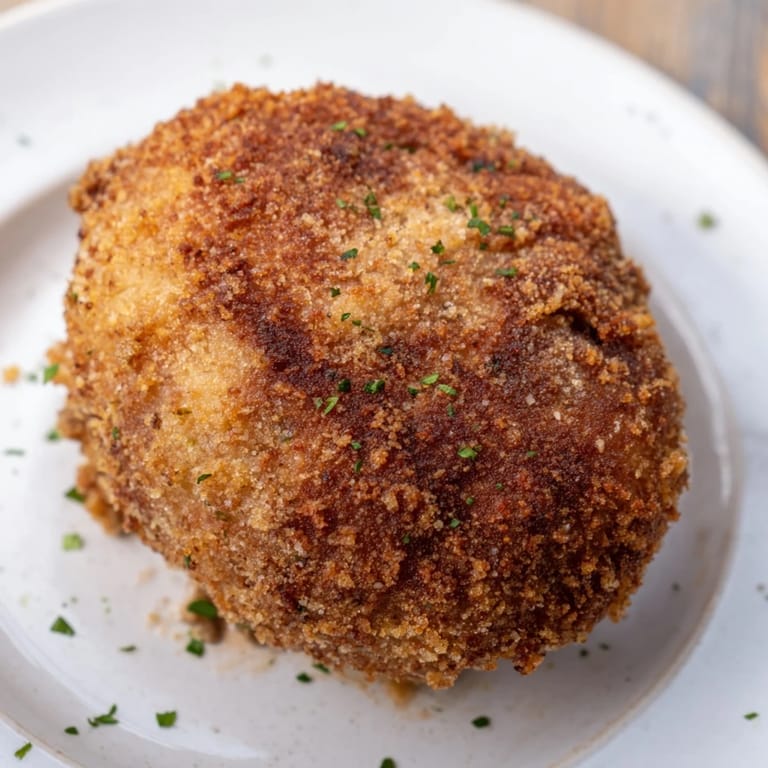
 My first Dutch croquette came wrapped in newspaper at a tiny frituur in Amsterdam, steam rising off the golden cylinder while I stood on a narrow street corner. The moment I bit through that shattering breadcrumb shell, the creamy beef ragout inside still warm and velvety, I understood why these humble things are treated like treasures in the Netherlands. Years later, I finally decided to recreate that exact sensation in my own kitchen, and what started as curiosity turned into a obsession with getting that contrast just right.
I made these for a dinner party when my Dutch friend was visiting, nervous that I'd somehow betray the recipe with an American interpretation. She took one bite, then quietly asked for the second one on the platter before I'd even finished serving everyone else. That's when I knew I'd finally nailed it.
Ingredients
- Stewing beef (250 g): Chuck or another tough cut breaks down beautifully into that shredded texture; avoid premium cuts that stay chunky and ruin the creamy filling's mouthfeel.
- Beef broth (500 ml): This becomes your cooking liquid and carries the flavor, so use something with actual depth, not the pale stuff from a can.
- Bay leaf: Adds an earthy backbone without screaming its presence; remove it completely or it'll leave a bitter bite.
- Onion (1 small): Finely chop so it dissolves into the filling rather than creating distinct pieces that interrupt the texture.
- Unsalted butter (1 tbsp + 40 g): Keeps everything silky; the extra amount for the roux is non-negotiable for structure.
- All-purpose flour (40 g + 100 g): The first batch thickens your filling, the second is for dredging and creates that gentle barrier before the egg wash.
- Whole milk (150 ml): This softens the beef's richness and makes the filling creamy instead of dense.
- Ground nutmeg (1/2 tsp): Seems small but it's the secret whisper that makes people wonder what you added.
- Fresh parsley (1 tbsp): Optional but worth it for a barely-there herbaceous note and flecks of color.
- Eggs (2 large): Your moisture adhesive; room temperature eggs adhere more evenly than cold ones.
- Fine breadcrumbs (150 g): Panko or Dutch paneermeel create that distinctive shattering crunch; never use the super-fine stuff meant for coating fish.
- Neutral oil: Sunflower or canola hold steady at high heat without adding competing flavors.
Tired of Takeout? 🥡
Get 10 meals you can make faster than delivery arrives. Seriously.
One email. No spam. Unsubscribe anytime.
Instructions
- Braise the beef until it surrenders:
- Combine beef, broth, bay leaf, and salt in a saucepan and bring to a boil. Lower the heat and let it simmer gently for about an hour, until the meat shreds with barely any pressure. Listen for that gentle murmur rather than an aggressive bubble; rushing this ruins the texture.
- Build the onion and beef base:
- Melt butter in a skillet and cook the onion until it's soft and translucent, about three minutes. Add your shredded beef and stir until combined, seasoning as you go.
- Make the roux and cream:
- In a clean saucepan, melt the 40 g of butter, stir in flour, and cook for two minutes while constantly stirring to remove the raw flour taste. Gradually add your reserved broth and milk, whisking constantly to prevent lumps from forming.
- Fold everything together:
- Add the beef mixture, nutmeg, and parsley to your roux and stir until you have a thick, creamy ragout. Taste it now and adjust salt and pepper because this filling won't develop more seasoning as it cools.
- Let the filling firm up:
- Spread the ragout in a shallow dish, cover it, and refrigerate for at least an hour. Cold filling shapes cleanly and holds together during frying; warm filling falls apart in your hands.
- Shape your cylinders:
- With cold filling, shape each portion into a cylinder about 8 cm long. Your fingers will be messy but that's part of the process.
- Set up your breading station:
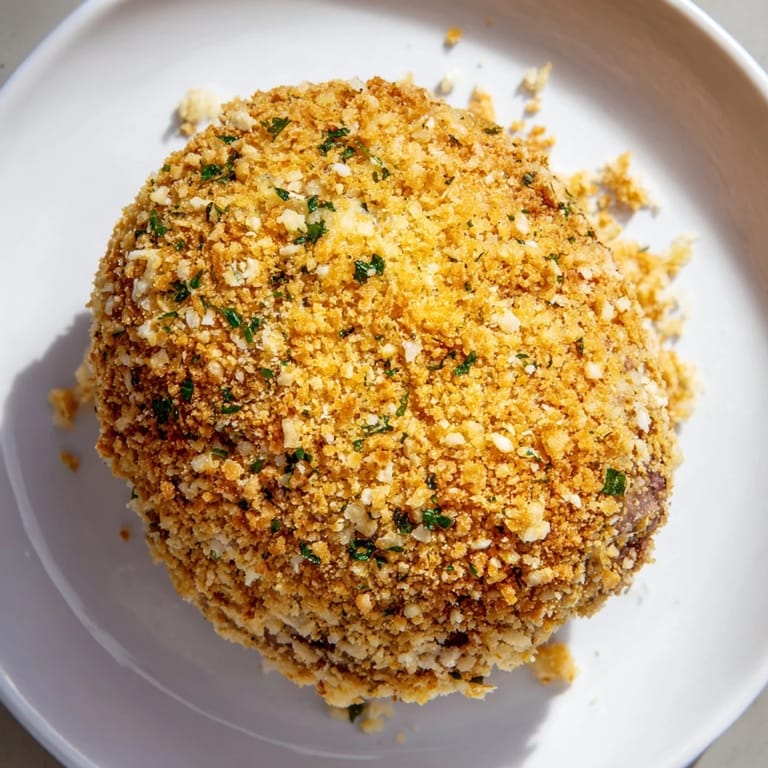
- Arrange three shallow bowls with flour, beaten eggs, and breadcrumbs in a line so you can move smoothly from one to the next. Coat each croquette in flour first to help the egg stick, then dip in egg, then roll in breadcrumbs until fully covered. If you want extra crispiness, repeat the egg and breadcrumb coating one more time.
- Heat your oil and fry:
- Bring oil to 180°C (350°F) in your deep fryer or heavy pot. Fry croquettes in batches for three to four minutes until they're golden brown all over, then drain them on paper towels while they're still warm and crackling.
 Save It
 There's something almost ceremonial about pulling a batch of croquettes from the oil and watching them drain, steam rising in that golden moment before serving. It's when you realize you've created something that tastes like someone cared enough to spend hours getting it right.
The Secret to Getting the Texture Right
The difference between a croquette that shatters beautifully and one that stays soft and doughy comes down to your oil temperature and your filling's firmness. Too-cold oil creates a soggy exterior; too-hot oil browns the outside before the inside heats through. I learned this the hard way after pulling out pale, lukewarm croquettes on my second attempt, so now I use a thermometer and treat 180°C as non-negotiable. The filling must be genuinely cold, almost resistant to shaping, because room-temperature filling will lose its structure the instant it hits heat.
Why This Tastes So Much Better Than Frozen
Homemade croquettes have a tender, deeply savory filling that store-bought versions can't replicate, partly because of freshness and partly because you've control over every flavor layer. Your beef tastes beef-forward, your roux doesn't taste like a flour-and-water paste, and there's no weird stale breadcrumb flavor hiding underneath. Making them yourself also lets you adjust the nutmeg or parsley to your preference, which sounds small but completely changes whether people taste sophistication or just fried dough.
Serving and Pairing
Croquettes come alive with the right accompaniments, turning from appetizer into a complete moment. Creamy mustard cuts through the richness perfectly, while crispy fries and a cold pilsner or pale lager create the kind of meal that makes you forget about calories for a while. Serve them within minutes of frying while that exterior is still shattering and the interior is still velvety, because they lose their magic as they cool.
- Offer a small dish of mustard or mayonnaise alongside, never skipped in Dutch restaurants.
- Pair with something cold and crisp to drink, whether beer or just sparkling water with lemon.
- Serve immediately while they're still crackling, because ten minutes of sitting is the enemy of croquettes.
 Save It
 These croquettes become the kind of thing you make for people you want to impress, the appetizer that makes everyone pause and ask for the recipe. Once you've made them once, you'll understand why the Dutch take them so seriously.
Recipe FAQs
- → What cut of beef is best for the filling?
Stewing beef like chuck works well due to its tenderness after slow simmering, creating a hearty and flavorful filling.
- → How can I ensure the croquettes are crispy?
Coat the croquettes evenly with flour, egg, and breadcrumbs, repeating the egg and breadcrumb step for extra crunch, then fry at 180°C until golden brown.
- → Can I prepare croquettes ahead of time?
Yes, after breading, croquettes can be frozen and fried directly from frozen, adding a couple of extra minutes to the frying time.
- → What sides pair well with these croquettes?
They go wonderfully with fries and a crisp pilsner or pale lager, enhancing the traditional Dutch snack experience.
- → Is it necessary to chill the filling before shaping?
Chilling the filling firms it up, making it easier to shape croquettes and ensuring they hold together well during frying.
- → Can the beef be replaced with another meat?
For a richer flavor, some use veal in place of part of the beef, but the classic version highlights tender stewed beef.